
From novice to pro: a beginner’s guide to Keencut cutters
- QuickByDesign
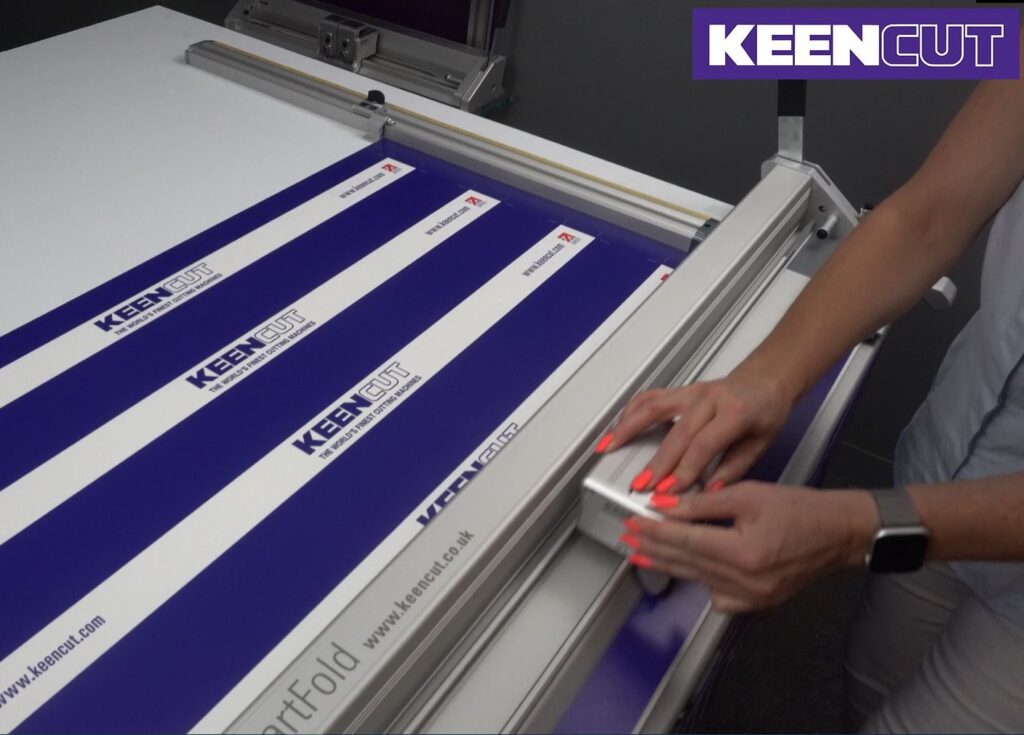
When it comes to precision cutting, few brands match the prowess and reliability of Keencut. Whether you’re in the signage business, a photographer, a print shop owner or an artisan, Keencut cutters provide unrivalled accuracy and ease. Their durability and innovative design make them an invaluable tool in any workshop.
In this blog, we’ll walk you through the essentials of these cutters, highlighting why they’re the go-to choice for professionals looking to achieve clean, crisp cuts every time.
Navigating the world of cutting tools can be daunting for a beginner. This guide aims to demystify Keencut cutters, offering you a clear path from beginner to pro. We’ll cover everything from choosing the right model for your needs to understanding the basic parts and their functions. Let’s embark on this journey together, and soon, you’ll be using your Keencut cutter with the confidence and skill of a seasoned professional.
Getting to know your Keencut cutter
Keencut offers a diverse range of cutters, each designed to meet different needs:
- SteelTrak: Ideal for heavy-duty materials like aluminium panels and hard plastics, perfect for industrial environments.
- Evolution3: These models offer versatility for various materials and precision needs. The FreeHand model is for more casual, flexible usage, whereas the BenchTop and SmartFold cater to more consistent, high-precision cutting in professional settings.
- Sabre Series 2: Excellent for general-purpose cutting, from banners to foam boards, offering precision and ease of use.
- Simplex: The perfect choice for lighter-duty cutting tasks in small studios or design spaces, offering affordability without compromising quality.
Each model serves specific cutting tasks, so understanding which model best fits your business needs is crucial.
Understanding the basic parts and functions
Regardless of the model, familiarising yourself with the basic components is essential. The cutting head and blade are the heart of the cutter. Keencut’s cutting heads are designed for smooth, clean cutting with blades that can be changed according to the material. The clamping system holds your material in place, ensuring accuracy and safety. Some models have advanced clamping systems for extra precision.
Keencut cutters typically feature a precise measuring system, such as a scale or ruler, integral for achieving accurate cuts. Many models come with or offer the option of a stand, providing stability and the ideal working height. And the sliding mechanism allows the cutting head to glide smoothly along the length of the cutter; crucial for clean, straight lines.
Understanding these parts and their functions helps in operating the cutter efficiently and maintenance, ensuring long-term performance and reliability for your business.
Setting up your Keencut cutter
Your journey with a Keencut cutter begins with its setup – a process that sets the foundation for all your future projects. It’s crucial to follow the manufacturer’s instructions closely during assembly. Ensure all components are securely fitted. Remember, a stable setup leads to more accurate cuts.
Carefully unbox and lay out all parts. Assemble the stand and base, if applicable, ensuring all screws are tightened. Attach the cutting head to the guide rail. Make sure it moves smoothly without any obstruction.
Fit the blade specific to your cutting needs. Keencut blades vary based on the material, so selecting the right one is key to precision. Check the clamping mechanism and ensure it’s working correctly. It should hold your material firmly without causing damage.
Calibration is the next critical step, ensuring that every cut you make is as accurate as possible. Adjust the blade depth according to the material you’re cutting. This avoids damage to the cutter and ensures a clean cut. Use a right angle, like a set square, to ensure the cutter is at a perfect 90-degree angle to the cutting table.
Perform some test cuts on scrap material. This helps check the accuracy and gets you accustomed to the cutting feel and pressure required.

Basic operating techniques
Now, let’s move on to making your first cut. This is an exciting moment, so let’s make it a great one. Place the material securely under the clamp. Ensure it sits flush against the ruler or alignment grid for a straight cut.
Depending on your material’s thickness, adjust the blade depth accordingly. Gently apply downward pressure on the cutting head and glide the blade along the material. Keep your motion steady and controlled.
Complete the cut through the entire length of the material, then gently lift the blade and return the cutting head to the start position. Keencut cutters are incredibly versatile, but each cutting task might need a slightly different approach. For materials like thick foam board, you might need multiple passes. Don’t try to cut through in one go, as it might not be as precise.
When cutting materials like fine paper or film, apply minimal pressure and use a new, sharp blade for a clean cut. Use the inbuilt measuring scale for accuracy. Keep the material firmly clamped and your motion steady.
While some Keencut models are more suited for straight cuts, for slight curves or shapes, move slowly, maintaining consistent pressure and alignment. Remember, patience and practice are key. Each material and cutter model might have its nuances, so give yourself time to understand and master these operations.
Tips for effective cutting
Effective cutting starts with how you handle and position your material. For your Keencut cutter to deliver the best results, understanding the nature of the material you’re working with is key. Ensure the material is secured firmly in place. If it moves during cutting, it can lead to imprecise cuts or even damage to the material.
Alignment is critical. Use the cutter’s grid lines, measuring tape or alignment lasers (if available) to ensure your material is perfectly aligned according to your cut requirements.
For larger pieces, proper support is vital to prevent the material from bending or moving. Use additional stands or supports if needed to keep the material level and stable. Thicker materials often require a deeper blade depth and more pressure, whereas lighter materials need just a gentle cut. Check the manufacturer’s guidelines for specific materials.
A slow, steady pace is usually recommended for precision. However, some materials might require a quicker cut to avoid dragging or snagging. Always perform a test cut on a scrap piece of the material you’re using. This helps in determining the right pressure, depth and speed for the perfect cut.
Maintenance and troubleshooting
Maintaining your Keencut cutter is crucial for its longevity and to ensure consistently high-quality cuts. Keep the cutter free from dust, debris, and any cutting residue. A clean machine is more precise and efficient. Lubricate the guide rails and cutting head mechanisms as recommended in the user manual, to keep movements smooth and precise.
Replace blades regularly to ensure sharp, clean cuts. Dull blades can ruin materials and affect the precision of your cuts. Regularly inspect all components for any signs of wear or damage. Timely replacement of worn-out parts prevents further issues and potential accidents. Even with the best care, you might occasionally run into issues.
If your cuts aren’t aligning correctly, check the material clamp for secure fitting and ensure that the cutter is squared accurately. Calibration might be required. Rough edges often mean a dull blade or incorrect blade depth. Replace the blade or adjust the depth settings. Inconsistent cutting pressure might occur due to debris in the guide rails or issues with the cutting head mechanism.
Clean the rails and check for any obstructions. And if cutting becomes laborious, the problem could be with blade sharpness, material thickness or a need for lubrication in the cutter’s moving parts. Remember, regular maintenance and keen observation of your cutter’s performance can pre-empt many of these issues. Your Keencut cutter is a reliable tool that, with proper care, will serve you and your business flawlessly for years to come.
Advancing your skills
Once you’ve mastered the basics of using your Keencut cutter, you may feel ready to tackle more challenging projects. This stage is not just exciting; it’s where your creativity can truly flourish. Start experimenting with cuts beyond straight lines. Explore curves, notches and intricate patterns. This may require more meticulous planning and slower, more precise cuts, but the results can be stunning.
Learn to layer different materials to create multidimensional designs. This technique demands accurate alignment and an understanding of how different materials interact under the blade. More complex projects will test your precision and patience. Take your time, measure twice (or even thrice) and remember that practice makes perfect.
Keencut cutters are known for their versatility, partly due to the various attachments and features available. Explore additional attachments like the textile cutting wheel or the freestyle cutter attachment. Each can open up new possibilities in terms of the materials you can work with and the cuts you can make.
If your model supports it, delve into advanced features such as depth adjustment, laser guides, or different blade types. These features can significantly enhance your cutting precision and ability. Sometimes, an upgrade or an additional accessory can transform the capabilities of your cutter, enabling you to work faster, more precisely, or on a wider range of materials.
How can Creative Office Solutions help?
Reflecting on your journey from a beginner to a proficient user of Keencut cutters, it’s clear that the path involves much more than just learning how to operate the equipment. It’s about understanding the intricacies of each task, mastering the machine and pushing the boundaries of what you can create.
Whether it’s through formal training, online tutorials, or simple trial and error, every new skill you acquire is an investment in yourself and your business. Remember, the journey from novice to pro is not just about mastering a tool; it’s about mastering an art.
If you’re looking to upgrade to a Keencut cutter, or need help getting to grips with your existing one, we’re here for you. Give us a shout today to see how we can help.
